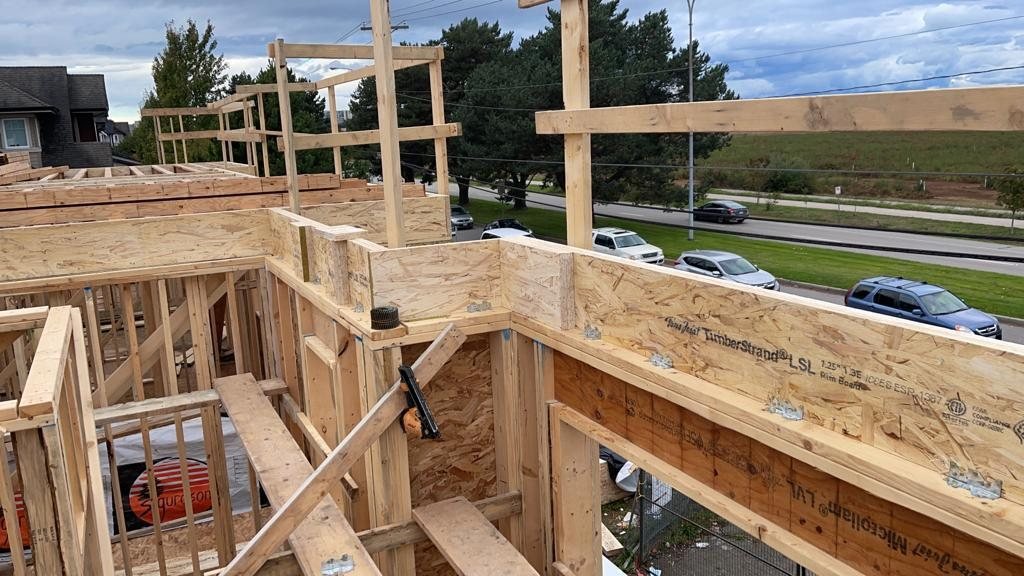
The photo shows a wood-framed floor edge, wall studs and an engineered wood member marked as a rim board. It captures a visible connection area; the image does not identify the member specification or confirm whether the assembly matches a particular project's drawings.
Project photo supplied by Moonlite Framing & Contracting Inc.
A floor edge connects several parts of a wood-frame structure. Joists, rim board, wall lines, openings and specified connections need to align with the approved design as a system. Because later layers can cover the junction, it is useful to check the layout and visible details before the platform is closed.
Read the floor and wall plans together
Start with the current framing package. Confirm the building area and revision, then compare the joist layout with the wall plan, bearing locations and any opening schedule. Look for transitions at stairs, balconies, cantilevers or changes in wall direction. A plan view may not show every connection clearly; use the referenced section or detail rather than assuming that a typical edge applies at each location.
The rim board or other specified edge member may help connect the floor perimeter and adjacent wall assembly, but its role and installation depend on the engineered product and structural details. Check the product marks against the specified member and location. Confirm the orientation, support and fastening information in the approved documents and manufacturer instructions. If a label, cut length or bearing condition does not match, ask the responsible designer or supplier before altering it.
Keep openings and services out of the load path
Floor openings for stairs, plumbing, ducts or other services can change which members carry loads and how the opening is framed. Locate each opening on the current plan and coordinate it with the joist package and the trades that need access. Do not cut, notch or drill an engineered member based on a generic rule or a nearby example; follow the specific product instructions and obtain required design approval for a change.
At the perimeter, check how the wall below, floor edge and wall above meet. The structural drawings identify the intended support and connections. The framing crew can record a concern with a marked location and drawing reference so the responsible person can answer the exact question. This is more useful than a note such as “check the edge,” which may not tell the next crew where to look.
Use a visible hold point before close-in
Before sheathing or another layer hides the floor edge, confirm that unresolved questions are closed and that any required inspection or project hold point has been coordinated. Keep access clear for the person responsible for the review. If the work sequence changes, update the affected crew and preserve the written response with the current drawing set.
Floor-edge review checklist
Compare joist marks and locations with the approved floor layout.
Match the rim member to the specified product and installation detail.
Check wall alignment, support, openings and transitions at stairs or projections.
Coordinate service routes before any member is cut or drilled.
Record mismatches by location and wait for project-specific direction before covering them.
Can an engineered rim board be cut to fit on site?
Do not assume it can. The product's permitted cuts and holes, if any, depend on its manufacturer instructions and the design. Confirm the specific member and location with the supplier or responsible design professional before changing it.
Official references
Consult the current code information and local inspection guidance alongside the approved framing package:
This is general construction information, not member sizing, structural design or approval to modify an engineered product.
Prepared by Moonlite Framing & Contracting Inc. Editorial Team. This article is general project-planning information, not engineering, permitting or code-compliance advice. Follow current approved project documents and direction from qualified professionals.
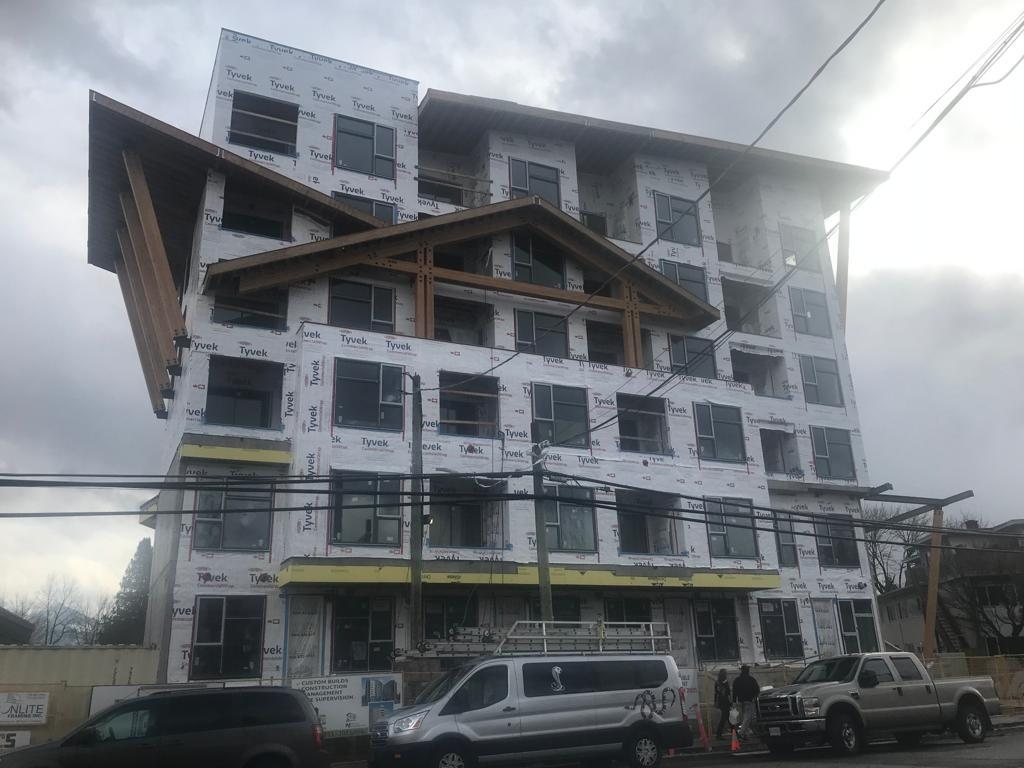
The photo shows a multi-storey building with weather-resistive material, installed windows and projecting balconies. It provides a useful visual prompt for the transition between structure and exterior work, but does not show the concealed framing, full membrane details or inspection status.
Project photo supplied by Moonlite Framing & Contracting Inc.
The framing-to-envelope handoff is easier to manage when the relevant structure, openings and water-control details are reviewed while the interfaces remain accessible. On a Lower Mainland project, rain can arrive during several construction stages. The best response is not a generic product choice; it is a coordinated sequence based on the approved drawings, product instructions and the people responsible for each trade.
Begin at openings and changes in plane
Window and door openings connect rough framing, sheathing, flashing, membrane and cladding. Confirm that the framed dimensions and locations match the current schedule before the next layer is installed. Check that the approved details identify how the sill, jambs, head and adjacent materials are intended to meet. If a drawing detail or product instruction is unclear, identify the exact opening and ask the envelope lead or design professional before covering it.
Balconies and other projections deserve their own interface review. They can meet exterior walls, floor edges, guards, drainage paths and structural supports in a compact area. The framing plan and envelope details need to be read together so the team knows which trade installs each component and when access is required. Do not infer the support, slope or waterproofing design from a photograph.
Keep the assembly sequence coordinated
Weather-resistive barriers, self-adhered membranes, flashing and cladding are products with specific functions. Follow the approved assembly and the current manufacturer's installation instructions for laps, transitions, fasteners and compatible materials. One product should not be substituted for another simply because both appear to control water. If the actual substrate, opening or transition differs from the detail, record the condition and get direction from the responsible professional.
Before exterior work advances, coordinate penetrations and attachments with the trades that need to pass through the wall. Mechanical vents, electrical entries, guard connections and other attachments may affect the continuity of the specified water-control layer. Agree on the order of work and who will complete the surrounding detail; a late cut or unassigned patch can leave an interface unclear.
Plan for exposure in Surrey weather
Temporary protection should be part of the site sequence, not an afterthought. Confirm which areas can remain exposed, how materials will be protected and who checks temporary measures after a shift or a change in weather. Follow the product guidance and project plan; a cover that traps moisture or hides an unfinished transition can create a new problem. Keep any area that requires review open until the designated person has assessed it.
Before the next layer goes on
Match each opening and balcony to the current architectural, structural and envelope details.
Confirm which trade owns flashing, membrane continuity, attachment and any required patching.
Check that service routes and later attachments are coordinated before making penetrations.
Record an unclear interface by location and drawing revision, then keep the response with the project documents.
Confirm any required permit inspection or project hold point with the permit holder.
Can a weather barrier make an unfinished wall ready for cladding?
Not by itself. Readiness depends on the complete approved assembly, the product instructions, the condition of the substrate and any required review or inspection. The project team should confirm the actual transition before it is covered.
Official references
Review current requirements and project information together:
This article is general coordination guidance. Project drawings, the specified assembly and qualified professionals determine the actual details and approval path.
Prepared by Moonlite Framing & Contracting Inc. Editorial Team. This article is general project-planning information, not engineering, permitting or code-compliance advice. Follow current approved project documents and direction from qualified professionals.
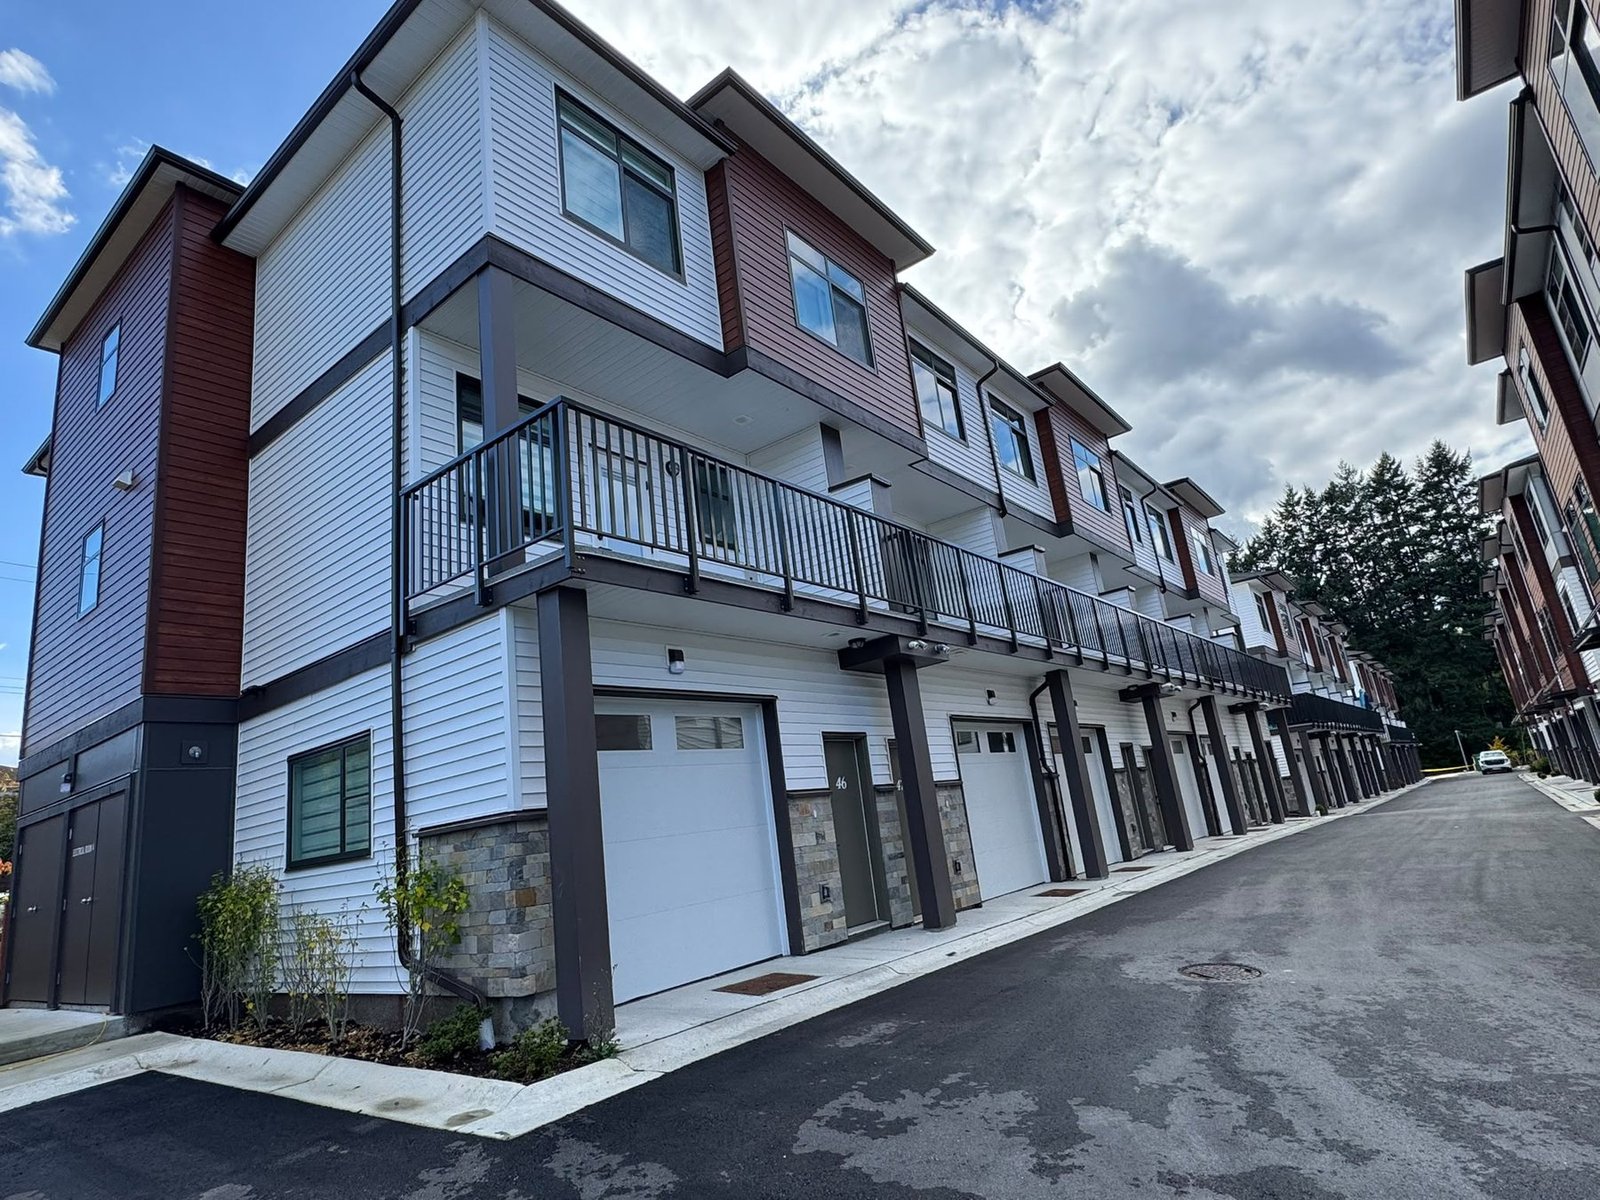
Townhouse framing starts with current coordinated drawings and a careful check of each unit. This photo shows attached homes with garages and upper balconies; it does not identify the builder, framing contractor, address or construction history.
Project photo supplied by Moonlite Framing & Contracting Inc.
Repetition can make a townhouse project more efficient, but it does not mean every wall or opening should be laid out from memory. Mirrored units, end conditions, stair locations and service routes can change from one home to the next. A reliable framing sequence treats the typical detail as a reference, then verifies where the actual unit differs.
Confirm which details truly repeat
Start with the current architectural and structural drawings. Confirm the unit type, building position, level and revision before copying a dimension or wall layout. A middle unit may share several conditions with its neighbour while an end unit has a different exterior wall, support or opening. A mirrored plan can also reverse a service chase or stair without making that change obvious on site.
Check the framing plan and opening schedule together. Windows and doors affect wall layout, headers, adjoining braced segments and the sequence for sheathing. If the architectural opening schedule and structural information do not appear to agree, mark the location and ask the designated project professional to resolve it. Do not change a member or move an opening simply because another unit looked similar.
Follow the floor and party-wall transitions
Repeated suites still connect to floor edges, stairs, roof framing and shared separations. Before work is covered, review the details at changes in level, wall intersections and service penetrations. The approved assembly documents determine what materials and clearances are required at a particular junction. A framing photograph or a typical floor plan cannot confirm a fire or sound rating.
Keep trade coordination tied to the same unit label. Mechanical, electrical, plumbing and envelope teams may be working across adjacent homes. A useful field note names the building, unit, level, grid or room, drawing revision and the question that needs an answer. That makes it easier to distribute a resolved change to every crew working on the repeated condition.
Make the repeatable sequence visible
Builders can use a unit-by-unit checklist to record the items that are intended to repeat and the exceptions that need a separate review. It can track wall type, rough-opening locations, floor transitions, backing, service routes and inspection access without replacing the approved plans. When a change is accepted, update the controlled drawing set and tell the affected trades before the next matching unit is framed.
In Surrey, the permit holder should confirm the applicable inspection sequence and current City requirements for the actual project. Inspection needs depend on the permit and scope, so a generic townhouse checklist cannot say when a specific area may be enclosed.
A quick repeat-layout review
Identify the unit type and whether the layout is mirrored, at an end, or at a transition.
Compare the current structural plan with the opening schedule and trade coordination information.
Mark differences by building, level and unit before repeating a wall or floor detail.
Confirm who can approve a design change and how the written response reaches each crew.
Keep required inspection access and any work awaiting review visible.
Does a typical unit detail apply to every townhouse?
Only when the approved project documents show that the condition repeats. Check the actual unit location, orientation, openings and interfaces, and ask the responsible project professional about any difference before changing the work.
Official references
Use the current official material alongside the project's approved drawings:
This guide explains a coordination approach. It does not approve a layout, establish an assembly rating or replace project-specific design and inspection requirements.
Prepared by Moonlite Framing & Contracting Inc. Editorial Team. This article is general project-planning information, not engineering, permitting or code-compliance advice. Follow current approved project documents and direction from qualified professionals.
British Columbia lists Thanksgiving Day as Monday, October 12, 2026. If framing or related work is underway in Surrey, put the long weekend into the project schedule early. The holiday date does not establish a particular supplier’s hours, an inspection appointment, or permission to leave an active site unattended; confirm those details with the people responsible for the project.
A construction-stage view from Moonlite’s project photo archive.
Confirm the working plan before the break
Review the current construction schedule with the builder, framing lead and affected trades. Confirm which areas are ready to proceed, which items depend on a drawing response, and what work needs a permit inspection or project hold point before it is covered. A long weekend is not a reason to compress the approved sequence or work from an outdated plan set.
For City inspections, check the current Surrey instructions and booking process with the permit holder. Availability and inspection requirements depend on the permit and project scope. Do not assume an appointment is available on a particular weekday or that a general checklist replaces project-specific direction.
Coordinate deliveries and site access
Confirm delivery dates and receiving arrangements directly with each supplier. Make sure the planned drop-off will not block a neighbour, emergency access, drainage, or an inspection route. If a delivery changes, update the site supervisor and the crews who depend on that material rather than letting the change travel informally.
Before crews leave, keep the approved drawings and the next handoff easy to find. A brief note can identify the building or unit, drawing revision, open question, responsible contact and agreed next step. If an anchor, opening or bearing location does not match the project documents, record it and wait for direction from the designated professional before changing the work.
Leave the site ready for a safe restart
Use the project’s approved safety, temporary-bracing and material-protection plans when preparing for a pause in work. Secure tools and stored products as directed by the site supervisor and supplier. Keep required access clear, and make sure any area awaiting review remains visible to the people returning after the holiday.
When work resumes, begin with a short walk-through. Check the visible condition of the work area and stored materials, confirm the current drawing revision, and review unresolved items with the responsible lead. Do not conceal work that still requires inspection or a documented response.
A practical pre-weekend checklist
Confirm the project calendar, crew plan and any site-access arrangements.
Check supplier delivery windows and receiving contacts directly.
Verify required inspections and hold points with the permit holder.
Keep current drawings, approved changes and open questions together.
Follow the site-specific plans for temporary conditions, security and material protection.
Assign a clear contact and first task for the return to work.
This article is general project-planning information. It is not engineering, legal, permitting or code-compliance advice. Follow current approved project documents and direction from qualified professionals.
Prepared by Moonlite Framing & Contracting Inc. Editorial Team.
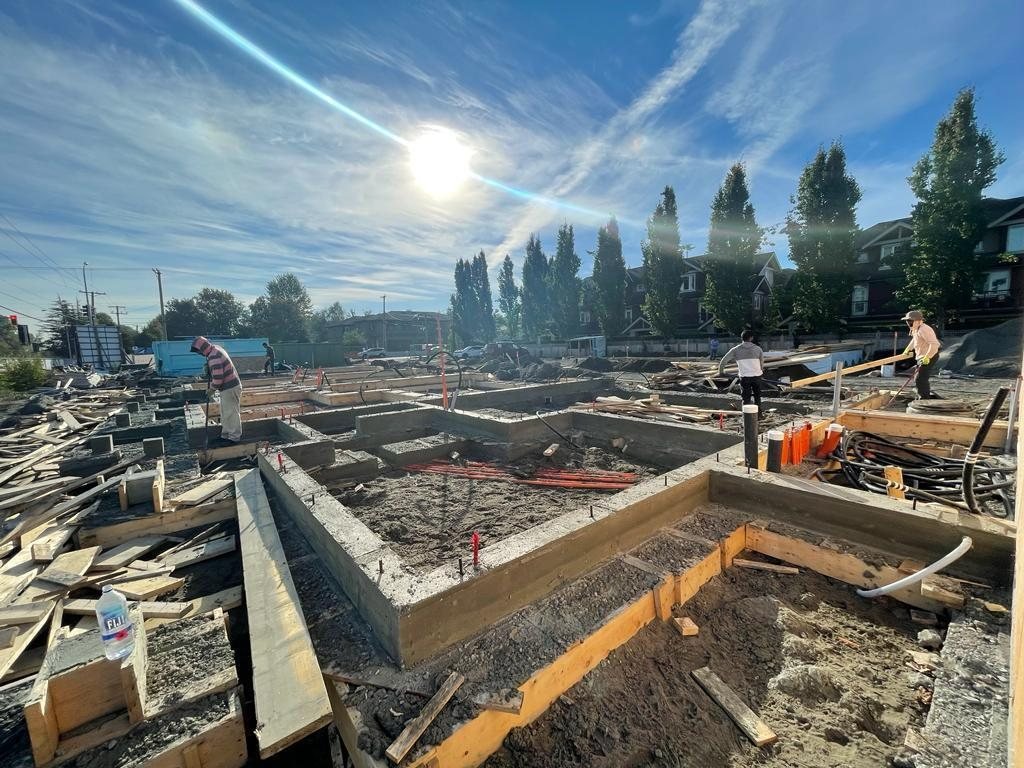
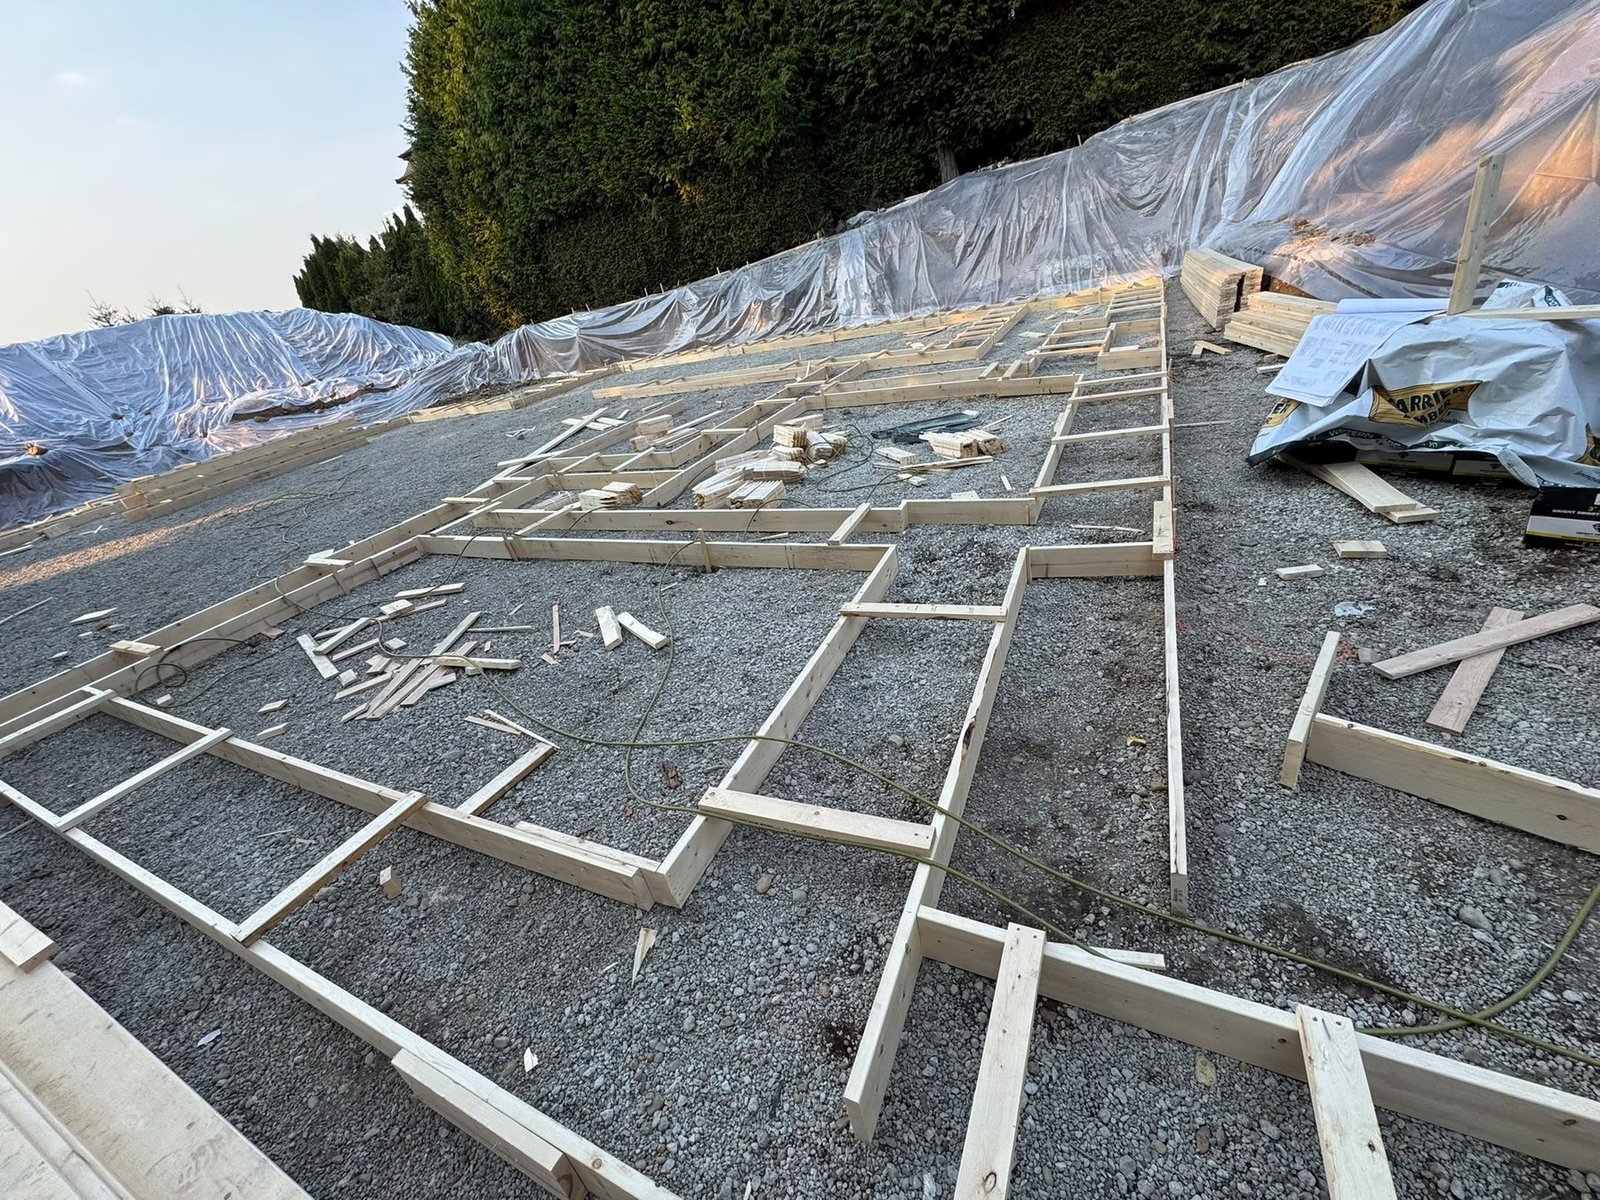
The photo shows wood layout forms across a gravel construction area, with lumber protected under sheeting nearby. It offers context for the early coordination work discussed here; it does not establish the project's address, date, permit status or contract scope.
Project photo supplied by Moonlite Framing & Contracting Inc.
Before framing material is installed, the foundation and framing information need to agree on where the structure bears and how the first walls are located. A short, drawing-based review can surface a mismatch while the relevant areas are still accessible. The approved plans, project specifications and directions from the responsible design professional control the work.
Start with the current drawing set
Confirm that the framing crew, builder and concrete team are referring to the same current revisions. Find the foundation plan, structural framing plan and any details that govern stepped walls, garages, porches, stairs or large openings. A revision cloud or note can change a dimension without changing the overall shape of the plan, so check the sheet index and revision information before relying on an older layout mark.
Use a common reference point or grid shown in the project documents. Compare the intended wall lines and bearing locations with the physical references established for the work. The goal is not to invent a site tolerance; it is to identify a difference clearly and ask the responsible person to resolve it before a plate, joist package or wall assembly makes the area harder to inspect.
Trace bearing and connection locations
Review where concentrated loads and framed walls are intended to meet the foundation. Look at the structural details for specified supports, anchors, hold-downs and other connectors. Confirm that the location and orientation shown on site match the approved information and that the required inspection or hold point has been addressed for that project.
If an anchor, bearing surface or dimension appears out of place, record the exact location and drawing reference. Do not shift hardware, cut a member or substitute a connection to make the layout fit. The structural professional or other designated project authority must provide direction for a design change. Keep the written response with the affected drawing revision so the people installing the next assembly can follow it.
Check openings and service interfaces early
Foundation steps, sleeves and planned service openings can affect framing above. Compare the locations that are visible on site with the current structural and coordination drawings, and identify who is responsible for confirming each interface. Moving a penetration can affect reinforcement, support or another trade's route, so raise questions before concrete work or the floor platform hides the condition.
For a house in Surrey, also confirm the inspection sequence and project requirements with the permit holder and the City's current guidance. Inspection stages vary by scope and permit. A general checklist cannot determine whether a particular inspection is required or whether a site is ready to proceed.
Make the first delivery workable
Once the layout questions are closed, confirm where packages can be unloaded and stored without blocking access, drainage or an inspection route. Ask the supplier or site supervisor how lumber and engineered products should be supported and protected. Covering a package should follow its handling guidance and the site's moisture plan; avoid arrangements that trap water or prevent the crew from checking the material.
Agree on a simple handoff record: building area, drawing revision, open item, responsible person and the approved response. That record can travel with the plan set or the site's established document system. It gives the framing crew a clear starting point and makes it easier to explain why an area is being held while a question is resolved.
A pre-framing review
Before the first framing package is installed, the project team can confirm:
The current foundation and structural drawing revisions are available to the affected crews.
Layout references, wall lines and specified bearing points have been checked against the approved documents.
Anchors, connectors, openings and service interfaces that need review have a named contact and recorded response.
Required permit inspections or project hold points have been coordinated with the permit holder.
Delivery, storage and access arrangements keep the work area usable and materials protected as directed.
Can framing begin as soon as concrete work is finished?
There is no single calendar rule for every project. The builder and project professionals should confirm the specified readiness, layout, connection information, required inspections and site access for that job. If a dimension or connection does not match the approved documents, resolve that question before the affected work proceeds.
Official references
Use current official guidance together with the approved project documents:
This article is general project-planning information. It is not a structural design, permit decision, inspection result or approval to change the work.
Prepared by Moonlite Framing & Contracting Inc. Editorial Team. This article is general project-planning information, not engineering, permitting or code-compliance advice. Follow current approved project documents and direction from qualified professionals.
Moonlite framing guide
Framing Inspections in BC: What to Confirm Before Work Is Covered
A practical overview of inspection coordination, approvals and questions to ask before framing is covered.
A framing inspection is a municipal checkpoint in the permit process. The inspector reviews the work identified by the permit and applicable code documents at a stage when required components are visible. The scope, order, booking route and trade prerequisites depend on the project. A framing inspection is not a substitute for design, a contractor quality check, a professional field review or an inspection by another trade authority.
Keep the current approved permit and drawings on site. Before booking, review the permit for the next required inspection, verify the work is ready and accessible, confirm site address and permit number, and satisfy listed prerequisites. If the City needs additional information or an engineering approval first, an incomplete request can create a delay. Use the current online inspection page or permit portal rather than an old phone number from an archived checklist.
Commonly visible framing items
Depending on the design and permit, the frame may include floors, load-bearing and braced walls, roof structure, openings, beams, posts, connections, sheathing, blocking, bracing and anchorage. The inspector checks relevant work against approved documents and code requirements. The project drawing set determines which conditions apply; there is no universal list that can guarantee a pass.
Keep hold-downs, straps, hangers, anchors and fasteners accessible where they must be reviewed. Make sure trusses and engineered products match their approved layout and have not been altered. Keep required temporary bracing in place until the permanent system is complete. If a component differs from the drawing, record it and obtain a design response before covering it.
Trade penetrations can affect structure, fire separation and acoustic performance. The builder should coordinate services and provide approved details for openings. Fire stopping or insulation may be inspected at a separate stage; do not assume a frame inspection accepts hidden work that has not been presented.
Surrey prerequisites vary by permit class
For commercial and townhouse projects, the City of Surrey says plumbing and electrical permits need rough-in approval before a frame inspection can be scheduled, and final approvals before scheduling a final building inspection. It also says approved permits and plans are required on site and complex buildings may require a group inspection. These statements are specific to that City guidance page; other permit types may have different conditions.
Surrey’s house-building guidance says to follow the inspection order on the permit. It also explains that site conditions, revisions and other requirements can affect construction and inspection sequence. Check the project’s permit, municipal portal and current building inspection instructions. A neighbor’s inspection order or a checklist from a different year may not apply.
If an inspector identifies deficiencies, list each location, description, drawing reference and responsible person. Ask the designer or engineer to review any change to load path, bracing or member size. Complete the approved correction, retain supporting documents and request a reinspection or other acceptance step shown by the City. Do not cover a correction until the required follow-up is complete.
How to prepare the site
Provide clear safe access, visible permit information, approved plans, and an informed contact who can answer basic questions about the work. Clear stored material away from components under review and ensure the inspector can reach the relevant areas without unsafe climbing or entering a restricted zone. Coordinate access with occupants, neighbouring trades and site-safety controls.
For a frame inspection, confirm the structure is at the stage the City requires. Some work may need to remain uncovered until inspection; follow the permit and inspector instructions. Verify required trade rough-ins and engineering approvals have been accepted where applicable. If weather or access prevents a full review, ask the City how to proceed rather than assuming the inspector will approve inaccessible areas.
Inspection versus professional field review
A registered professional’s field review addresses the professional’s scope and obligations under the project. A municipal inspector exercises the City’s authority under the permit. The contractor’s internal quality review checks its own work and helps catch issues. These roles may overlap in time, but they are not interchangeable, and a municipal pass does not erase the need for sealed documents or a required field-review letter.
If the permit requires a Schedule B or other professional documentation, confirm the professional’s site-review stages and report format in advance. Coordinate visits before concealed components are covered. Keep approved revisions and the reports with the project record. The owner and design team decide which registered professionals are required for the application.
Before you call: (1) confirm the required inspection on the permit; (2) check the current approved plans and revisions; (3) complete required trade rough-ins or engineering approvals; (4) expose and safely access the work; (5) provide the permit number, address and contact; and (6) make a correction log if the inspection does not pass. The exact checklist still comes from the permit and City.
For a framing estimate or scope discussion, send Moonlite the project location, current plan revision, type of building, target start window and any known inspection conditions. Keep the City as the authority for municipal acceptance and the design team responsible for project-specific technical direction.
The permit holder and project team should assign that responsibility before construction. The person responsible should confirm the local booking process and required inspection stage.
What may an inspector review?
The inspection follows the approved plans and applicable requirements. Visible framing, connections and related work may be reviewed; the exact checks depend on the project and authority having jurisdiction.
Can framing be covered before the inspection?
Do not cover work that still requires inspection or approval. Confirm the required sequence with the building official and permit holder before insulation or finishes hide the work.
What happens if deficiencies are identified?
The project team should record the items, arrange the required corrections and follow the authority’s direction about reinspection. Keep the responsible builder and design professionals informed.
Checked 27 September 2026. Follow the requirements on the actual permit.
M
Prepared by Moonlite Framing & Contracting Inc. · Editorial team
Moonlite works in framing and contracting. This guide is general information for owners, builders and project teams; it is not engineering, code-compliance, legal or permitting advice. Verify project decisions with the current authority, approved documents and qualified professionals.
A framing schedule is one part of the build schedule
There is no single reliable number of days for framing a house. A schedule depends on floor area, storeys, design, crew size, material system, site access, supplier lead times, weather, predecessor work, inspection hold points and the readiness of follow-on trades. A simple repeatable plan and a complex custom roof may have similar area but very different sequencing and coordination needs.
The framing contractor can discuss a production plan after reviewing drawings and scope, but the general contractor’s overall project calendar also includes permits, excavation, foundations, service connections, inspections, enclosure, mechanical and electrical work. A framing milestone should not be promised independently of those dependencies.
What needs to be ready
Before a crew mobilizes, confirm the permit and approved drawings, foundation location and dimensions, concrete or bearing conditions, access, material drop locations, utility constraints, safety arrangements and start conditions in the contract. If the site is not ready, labour or equipment may be delayed or resequenced. Keep responsibility for confirming readiness clear between the owner, builder and framing contractor.
Engineered beams, floor systems and trusses can have procurement and shop-drawing lead time. The schedule should identify who submits design information, who reviews the shop drawings, who releases fabrication and who books transport or crane service. Do not use a generic supplier lead-time claim as a current commitment; request an actual quote and delivery window for the specified product.
Weather, storage and access change the sequence
Rain can affect delivery timing, material protection, sheathing progress and enclosure work. A wet-season plan considers cover, drainage, safe access, temporary stability and how the project will handle materials exposed between shifts. The actual design and product instructions govern handling. If framing must pause for weather or another trade, the builder and crew should reassess the temporary condition before work resumes.
Tight lots may require smaller drops, street permits or staged unloading; a crane pick needs a safe route and suitable setup. Neighbouring work, parked vehicles, overhead utilities and school or business hours can restrict access. Confirm logistics from the address and site plan rather than relying on a broad city-level estimate.
Inspections and trade coordination
Inspections create planned hold points. The permit identifies which inspections apply and their sequence; the City may require completed trade rough-ins, engineering approval or other prerequisites before a framing inspection. Schedule the work to expose required components for review and allow time for any corrections. Insulation, membranes and drywall should not hide work that still needs an inspection or field review.
Mechanical and electrical layouts should be coordinated with joists, beams and trusses before site cutting becomes tempting. Ask trades to identify routes early and follow product rules for holes and notches. A late service conflict can require a design review and change the framing sequence, even if the physical repair seems small.
Build a milestone plan
Instead of relying on a single completion date, break the work into mobilization, floor or platform stages, wall erection, upper floors, roof structure, sheathing, inspection and handoff milestones. For each, record the predecessor, materials needed, decision deadline, responsible person, inspection or professional review and successor trade. This makes the schedule easier to adjust when a drawing, delivery or site condition changes.
The City of Surrey’s permitting-timelines page reports permit-review averages, not on-site framing duration. Those timelines change and apply to complete, accurate applications as described by the City. Keep permit review and construction duration separate in the project plan.
Information to share for a useful schedule discussion
Send the current drawing set, approximate area, number of levels, framing system, site location, desired start window, known access limits, permit status and procurement status. Mention unresolved design decisions, utility or foundation readiness, truss and engineered-product order status, and whether other trades will work concurrently. A schedule conversation based on those details is more useful than asking for a universal number of days.
Ask how weather days, inspection delays, late design changes, unavailable materials and site-readiness issues are treated. The contract or project schedule should say how changes are communicated and whether another trade’s delay moves the framing sequence. A realistic plan names assumptions so the team can update them openly.
There is no reliable duration without the project plans, crew and site schedule. Ask for a milestone-based estimate that separates site time from the time needed for materials, inspections and trade coordination.
What can change the framing schedule?
Building size and design, drawing changes, material readiness, site access, weather protection, crew availability and inspection timing can all affect the sequence.
Can framing work continue during winter in BC?
Work may be scheduled through colder, wetter months, but the plan should account for weather, safe access, material protection and the project’s specific conditions.
What should be ready before the crew starts?
Confirm the site is released for the work, the current drawings are coordinated, materials and equipment are planned, and responsibilities for access, deliveries and inspections are clear.
M
Prepared by Moonlite Framing & Contracting Inc. · Editorial team
Moonlite works in framing and contracting. This guide is general information for owners, builders and project teams; it is not engineering, code-compliance, legal or permitting advice. Verify project decisions with the current authority, approved documents and qualified professionals.
Prepared by Moonlite Framing & Contracting Inc. · Editorial team
Moonlite works in framing and contracting. This guide is general information for owners, builders and project teams; it is not engineering, code-compliance, legal or permitting advice. Verify project decisions with the current authority, approved documents and qualified professionals.
A framing estimate cannot be determined reliably from city and floor area alone. Two projects with the same gross area may differ in storeys, wall heights, roof geometry, structural spans, material system, access, staging, drawings, schedule and included supply. Even the measured area can mean different things: conditioned floor area, footprint, gross area, roof area and area covered by a specific quote are not interchangeable.
Online cost claims should say what they include, when the data was collected, which region it covers and whether it describes materials, labour, a full package or the entire building. The figures in the supplied estimator draft did not have a verified local bid basis or a current City fee schedule, so the site does not repeat them as market facts. A written project quote is a more reliable planning input.
The main drivers in a real proposal
Plans and geometry shape quantities and installation effort: floor count, wall heights, roof lines, openings, cantilevers and concentrated loads all matter. Structural details can specify engineered beams, posts, connectors, lateral elements or non-standard assemblies. These are design-specific; do not choose a member from an internet price list or compare an engineered scope with a simpler framing package as if they were identical.
Scope boundaries also move the total. Check whether a bid includes lumber, sheathing, fasteners, engineered products, trusses, delivery, unloading, crane or lift time, temporary bracing, waste removal, weather protection and backing. Site access, staging, traffic restrictions, occupied-building rules, winter or wet-weather sequencing and the readiness of concrete or preceding trades can affect how the work is organized.
Finally, identify the drawing revision, quote validity, allowances, exclusions, unit rates for changes, payment schedule and response process for revisions. If two bids differ, ask each contractor to explain the scope and assumptions rather than choosing by the headline total alone.
Use published indexes for context, not a local quote
Statistics Canada’s first-quarter 2026 Building Construction Price Index release reported a 0.6% quarterly increase in the residential composite and a 0.5% increase in the non-residential composite across the reported national measures. Those figures are broad construction indexes; they are not a live Surrey price for SPF lumber, Douglas fir, LVL, glulam or framing labour. An index trend can describe aggregate movement, but it cannot price the takeoff for one address.
For material planning, ask suppliers for current written quotes against a defined bill of materials and confirm grade, dimensions, delivery, quote expiry, availability and substitution rules. Lumber and engineered-product prices vary by product, source, volume and date. A framing bid should clarify whether later supplier changes are passed through, covered by a fixed price or handled under another written term.
Compare estimates on the same scope
Give each bidder the same current drawings and written scope. Request separate inclusions and exclusions for labour, materials, trusses, engineered wood, sheathing, hardware, equipment, cleanup and inspection coordination. Ask what site readiness is assumed and whether the amount is fixed, an allowance or an estimate. Confirm how the bidder prices a new drawing revision or hidden condition.
The site’s budget worksheet multiplies an area by low and high rates that you enter from actual quotes, then adds an allowance you enter. It does not select a market rate, infer project value or add taxes and permit fees. For Surrey permit costs, use the City’s official Building/Sign Permit Fee Estimator and read its conditions; estimated fees can differ from the actual amount.
A calculator based on hypothetical default rates can look precise while hiding unknowns. This guide keeps the arithmetic transparent: use the quote data you have, make inclusions visible and ask the contractor to confirm the exact contract scope.
Should I use a price per square foot to compare framing quotes?
A per-square-foot figure can help with early budgeting, but it does not describe a complete project scope. Compare written proposals prepared from the same drawing set and inclusions.
Why do framing quotes expire?
Material costs, project details and crew availability can change. Ask how long the proposal remains valid and what happens if the drawings or schedule change.
Can I supply the lumber myself?
That arrangement needs to be agreed before work is priced. Confirm who orders, checks, stores and coordinates the lumber and engineered products, and how shortages or damaged material will be handled.
What information helps get a useful estimate?
Share the current architectural and structural drawings, project type, number of levels, location, scope, target start window and any known access or delivery limits.
Checked 27 September 2026. The index is broad context, not a local lumber quote.
M
Prepared by Moonlite Framing & Contracting Inc. · Editorial team
Moonlite works in framing and contracting. This guide is general information for owners, builders and project teams; it is not engineering, code-compliance, legal or permitting advice. Verify project decisions with the current authority, approved documents and qualified professionals.
Prepared by Moonlite Framing & Contracting Inc. · Editorial team
Moonlite works in framing and contracting. This guide is general information for owners, builders and project teams; it is not engineering, code-compliance, legal or permitting advice. Verify project decisions with the current authority, approved documents and qualified professionals.
Ask what kinds of framing work the contractor wants to review and which drawings or project details are needed to decide whether the scope is a fit. Provide the building type, location, approximate area, number of levels, permit status, target start window and current drawing set. A clear first request helps the contractor respond with relevant questions instead of guessing at a price or schedule.
Ask whether the proposal is labour only, supply and install, or a defined part of a larger package. Identify floors, walls, roof structure, trusses, engineered wood, sheathing, connectors, blocking, temporary bracing, equipment, delivery, cleanup and weather protection. State which tasks belong to the general contractor or another trade. Compare each bid against the same list.
Questions about plans and changes
Which drawing revision does the price use? Who coordinates truss and engineered-product shop drawings? How are questions and conflicts recorded? Who can authorize a change, and what documentation is needed before the crew proceeds? These questions help keep site decisions tied to the current approved set and avoid building from superseded information.
Ask how design revisions, concealed conditions, client selections and material substitutions affect price and timing. A written change process should identify who requests, prices, approves and records a change. For a structural change, the responsible designer or engineer needs to review it where required. A field conversation can uncover the question; it does not replace approval.
Questions about materials and site logistics
Confirm material responsibilities: product types, grades, supplier quotes, delivery, unloading, storage, lifting, hardware, waste and protection. Ask whether the estimate assumes a crane, lift, staged deliveries, road access or unobstructed work area. For wet-weather exposure, ask how materials are stored and which design or manufacturer instructions control protection and drying.
Discuss site readiness, working hours, public access, existing occupancy, neighbouring constraints, utilities, safety responsibilities and staging. For engineered beams, floor systems or trusses, clarify the order and approval sequence, delivery dates, who checks piece marks, and who coordinates installation details. These answers reveal whether the project plan is realistic for the actual lot.
Questions about inspection and handoff
Ask which inspections are identified in the permit, who requests them, what must remain visible, and which trade or engineering approvals must happen first. Surrey states that the permit shows the inspection order; some commercial and townhouse projects have trade prerequisites before a frame inspection. Responsibility for booking and site access should be explicit in the contract.
At handoff, ask what records the contractor provides, how deficiencies are tracked, what approved revisions were installed and what remains incomplete. Do not ask for a blanket “code guarantee” in place of named documents and professional responsibilities. Confirm how the contractor responds to inspection comments and who coordinates a design answer if a correction changes the approved detail.
Questions about the written proposal
A proposal should identify contractor and client, site, scope, drawing date/revision, start assumptions, duration assumptions, inclusions, exclusions, allowances, payment milestones, quote expiry, tax treatment, insurance evidence where relevant, change orders, cleanup, dispute process and closeout. Ask for the total to be broken down enough to compare scope, without assuming every bidder uses the same trade package.
Request proof of qualifications, insurance or safety systems only as relevant to the work and review current documents directly. Do not treat a website badge, social profile or competitor comparison as evidence. Ask who will supervise, which subcontractors or suppliers are involved and how site questions reach the person authorized to respond.
Red flags in a rushed comparison
Be careful when a bid has no drawing reference, hides major exclusions, offers a fixed amount before plans are available, proposes unreviewed structural substitutions or asks the owner to proceed without the required permit. A low headline amount can reflect omitted materials or work. A high amount can include scope other bids excluded. Resolve the difference in writing before signing.
Avoid relying on generic per-square-foot numbers, guaranteed dates without stated assumptions or an unsupported claim that an assembly meets a fire, sound or seismic target. Ask the contractor to identify the documents and responsible professional behind a technical claim. The current code and permit authority decide compliance for a project.
Moonlite’s estimate form can receive the building type, project location, drawing stage, scope and target start window. Visitors may attach plans in their own email app; the form does not upload or store them on the site.
It should describe the work, price, schedule, payment terms, included materials and services, exclusions, and how changes are approved. Ask for those items in writing.
How can I compare two framing bids fairly?
Give each contractor the same drawing revision and written scope. Compare inclusions, exclusions, allowances, schedule assumptions and change-order terms as well as the total.
What should I ask about inspections?
Ask who books each inspection, who meets the inspector, how deficiencies are tracked and who coordinates reinspection. Confirm the required sequence with the permit holder and local authority.
What documents should I share before hiring?
Start with current architectural and structural drawings, relevant schedules and the written scope. You can add the target start window, site access details and any outstanding design questions.
M
Prepared by Moonlite Framing & Contracting Inc. · Editorial team
Moonlite works in framing and contracting. This guide is general information for owners, builders and project teams; it is not engineering, code-compliance, legal or permitting advice. Verify project decisions with the current authority, approved documents and qualified professionals.
Prepared by Moonlite Framing & Contracting Inc. · Editorial team
Moonlite works in framing and contracting. This guide is general information for owners, builders and project teams; it is not engineering, code-compliance, legal or permitting advice. Verify project decisions with the current authority, approved documents and qualified professionals.
A framing contractor organizes and installs the structural wood or specified framing scope for a project. The work usually begins with current architectural and structural drawings, a defined contract, site access information and a schedule coordinated with the builder. The contractor plans labour, layout, material handling, equipment, temporary bracing and handoffs to follow-on trades. The exact package varies, so the phrase “framing included” should be backed by a written list of work and exclusions.
The crew lays out walls and floor systems, installs members and connections shown on approved documents, coordinates engineered-product and truss packages, and raises questions where site conditions do not match the plan. A framing contractor may assist with shop drawing or inspection coordination when included in the agreement. It should not replace the architect or engineer responsible for structural design, nor alter a load path without the required review.
What can be part of the scope
A project may include floor joists or trusses, beams, posts, wall framing, headers, roof trusses or rafters, sheathing, blocking, hardware and temporary stability work. Some packages also include material supply, delivery, hoisting, engineered lumber, site cleanup or a portion of weather protection. Other projects separate those tasks among the general contractor, supplier and specialist trades. Ask which drawings are priced, which revision is current and whether the bid covers labour only or supply and installation.
Write down interface responsibilities: who measures and confirms openings, receives truss packages, provides access, supplies lifting equipment, installs backing, coordinates penetrations, arranges inspections and corrects deficiencies. A clear scope avoids gaps between framing, concrete, windows, roofing, mechanical and electrical work. It also makes change orders easier to evaluate when a design revision moves a wall or changes the structural system.
Questions to ask before work starts
Ask how drawing questions are recorded, who approves changes, how the crew will protect partially completed work, what temporary bracing is required, and which inspections must happen before framing is concealed. Confirm site access, delivery constraints, working hours, waste expectations, schedule dependencies and the method for communicating delays. These questions are about clear coordination; they do not imply a particular contractor is licensed, insured or qualified unless the company provides current evidence.
Keep the approved set and revisions accessible to the people building from it. If the framing crew finds an unexpected beam, opening, foundation condition or service conflict, record the location and ask the design team for direction. Do not treat a quick field sketch or verbal suggestion as approval for a structural change.
How a project hands off
A useful framing handoff identifies areas complete, remaining items, inspection status, unresolved questions, temporary support and any approved revisions. It can also include product documents and photographs of concealed connections when the contract or design team requests them. A passed municipal inspection, a professional field review and a contractor’s own quality check have different purposes; one should not be represented as a substitute for another.
For projects in Surrey, the City says approved drawings must be on site and the inspection order is shown on the permit. Contractors and owners should confirm who books each inspection, makes the site ready, provides access, tracks deficiencies and follows up. Requirements differ by permit type, so use the project’s permit conditions and the City’s current building-inspection pages.
Some builders manage framing with their own crews, while others hire a dedicated framing contractor. Confirm who owns the framing scope, crew coordination, materials and inspection follow-up in the project agreement.
What is the difference between rough framing and finish carpentry?
Rough framing builds the structural floor, wall and roof framework. Finish carpentry adds visible details such as trim, doors, stairs and built-ins later in the project.
Does framing include the foundation?
Foundation work is a separate scope. Framing typically begins after the foundation or supporting structure is ready, with the exact division of work set out in the contract and drawings.
Are materials part of a framing quote?
It depends on the proposal. Check whether the quote covers labour only or also lumber, engineered products, trusses, sheathing, connectors, equipment and delivery.
M
Prepared by Moonlite Framing & Contracting Inc. · Editorial team
Moonlite works in framing and contracting. This guide is general information for owners, builders and project teams; it is not engineering, code-compliance, legal or permitting advice. Verify project decisions with the current authority, approved documents and qualified professionals.
Prepared by Moonlite Framing & Contracting Inc. · Editorial team
Moonlite works in framing and contracting. This guide is general information for owners, builders and project teams; it is not engineering, code-compliance, legal or permitting advice. Verify project decisions with the current authority, approved documents and qualified professionals.