Wood-framed floor edges: rim boards and wall alignment
The photo shows a wood-framed floor edge, wall studs and an engineered wood member marked as a rim board. It captures a visible connection area; the image does not identify the member specification or confirm whether the assembly matches a particular project's drawings.
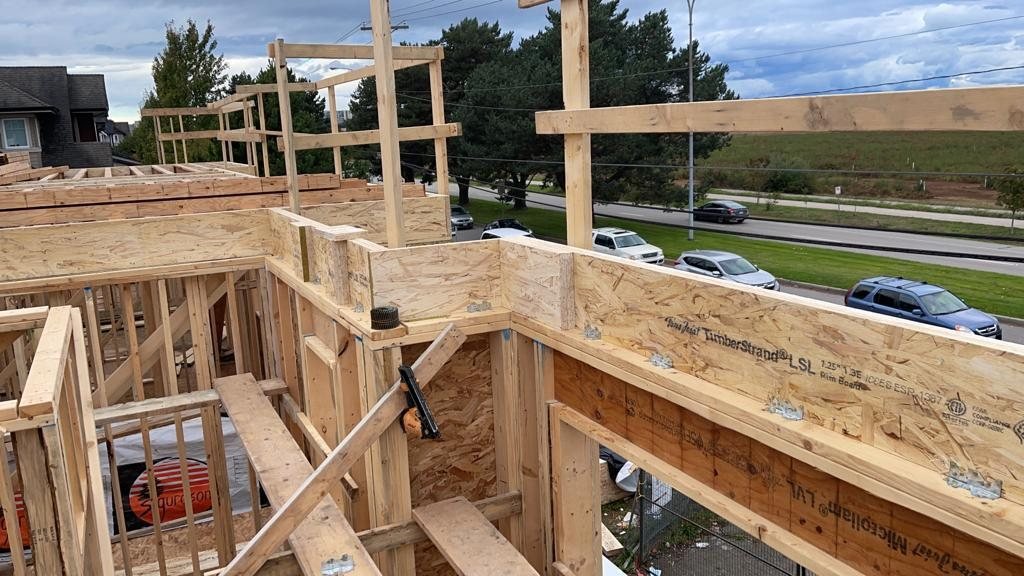
A floor edge connects several parts of a wood-frame structure. Joists, rim board, wall lines, openings and specified connections need to align with the approved design as a system. Because later layers can cover the junction, it is useful to check the layout and visible details before the platform is closed.
Read the floor and wall plans together
Start with the current framing package. Confirm the building area and revision, then compare the joist layout with the wall plan, bearing locations and any opening schedule. Look for transitions at stairs, balconies, cantilevers or changes in wall direction. A plan view may not show every connection clearly; use the referenced section or detail rather than assuming that a typical edge applies at each location.
The rim board or other specified edge member may help connect the floor perimeter and adjacent wall assembly, but its role and installation depend on the engineered product and structural details. Check the product marks against the specified member and location. Confirm the orientation, support and fastening information in the approved documents and manufacturer instructions. If a label, cut length or bearing condition does not match, ask the responsible designer or supplier before altering it.
Keep openings and services out of the load path
Floor openings for stairs, plumbing, ducts or other services can change which members carry loads and how the opening is framed. Locate each opening on the current plan and coordinate it with the joist package and the trades that need access. Do not cut, notch or drill an engineered member based on a generic rule or a nearby example; follow the specific product instructions and obtain required design approval for a change.
At the perimeter, check how the wall below, floor edge and wall above meet. The structural drawings identify the intended support and connections. The framing crew can record a concern with a marked location and drawing reference so the responsible person can answer the exact question. This is more useful than a note such as “check the edge,” which may not tell the next crew where to look.
Use a visible hold point before close-in
Before sheathing or another layer hides the floor edge, confirm that unresolved questions are closed and that any required inspection or project hold point has been coordinated. Keep access clear for the person responsible for the review. If the work sequence changes, update the affected crew and preserve the written response with the current drawing set.
Floor-edge review checklist
- Compare joist marks and locations with the approved floor layout.
- Match the rim member to the specified product and installation detail.
- Check wall alignment, support, openings and transitions at stairs or projections.
- Coordinate service routes before any member is cut or drilled.
- Record mismatches by location and wait for project-specific direction before covering them.
Can an engineered rim board be cut to fit on site?
Do not assume it can. The product's permitted cuts and holes, if any, depend on its manufacturer instructions and the design. Confirm the specific member and location with the supplier or responsible design professional before changing it.
Official references
Consult the current code information and local inspection guidance alongside the approved framing package:
This is general construction information, not member sizing, structural design or approval to modify an engineered product.
Prepared by Moonlite Framing & Contracting Inc. Editorial Team. This article is general project-planning information, not engineering, permitting or code-compliance advice. Follow current approved project documents and direction from qualified professionals.